Additional Information
Click to view our 2021 Contractor Installation Guide for Roof Drainage & Ventilation products!
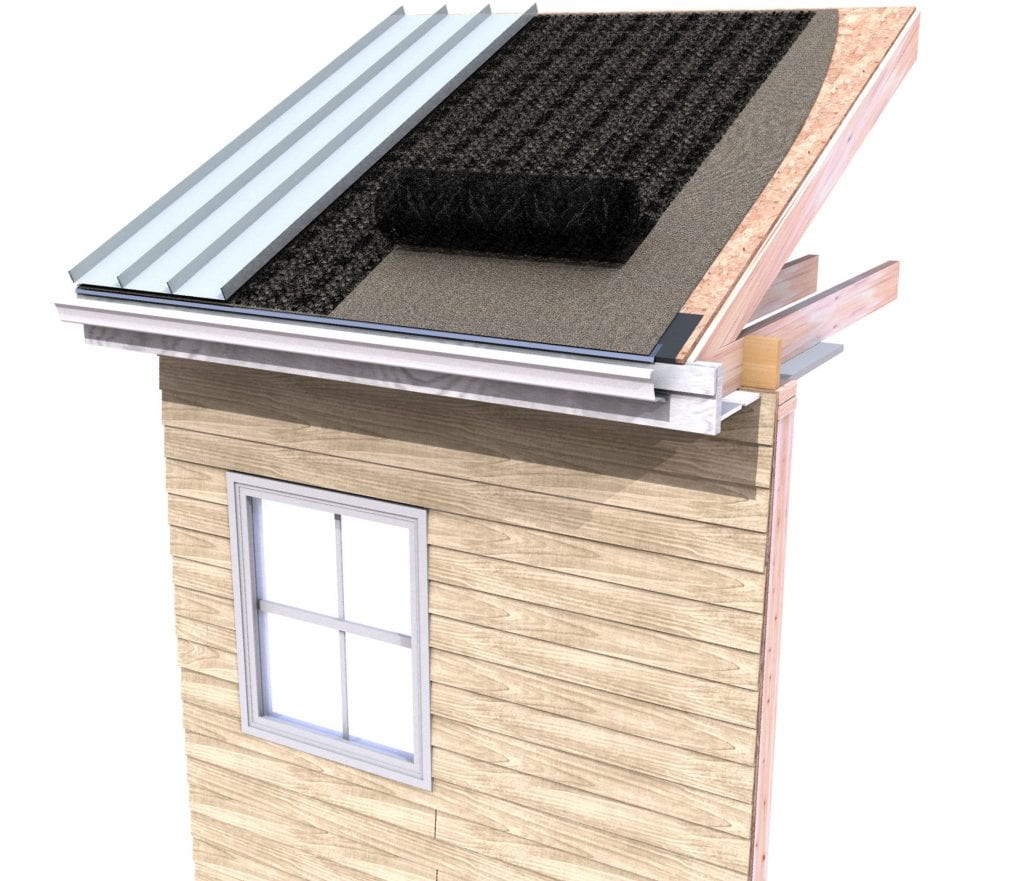
Install plywood roof sheathing onto rafters. Install roofing felt or ice dam protection membrane over sheathing. Check local codes and manufacturer’s recommendations for specific requirements.
Install R-Vent® over roofing felt, ice protection membrane, and metal edge flashing or drip edge. Ensure R-Vent® material is installed flush against edge of the flashing or drip edge. Carefully trim the R-Vent® material at all penetrations with a utility knife or scissors.
When installing metal or alternate material shingles, unroll R-Vent® horizontally just ahead of the shingles as they are installed. Tack or nail R-Vent® in place every three square feet. Do not overlap the R-Vent® material. Butt each course tightly against the previous course and at vertical seams.
When installing vertical metal roofing panels, unroll R-Vent® vertically from ridge to eave just ahead of the metal panels as they are installed. Tack or nail R-Vent® in place every three square feet. Do not overlap the R-Vent® material. Butt each course tightly against the previous course and at vertical seams.
At ridge locations, extend R-Vent® material over the ridge and butt against the material on the opposite side of the roof. If a ridge vent is utilized, follow the ridge vent manufacturer’s recommendations for underlayment material installation.
Apply roofing materials using manufacturer’s recommended fasteners and instructions, allowing for the additional thickness of the R-Vent® material.
| Roof Ventilation Products | Thickness | Roll Size | Sq. Ft. Per Roll | Rolls Per Pallet | UOM |
| R-Vent® | .361” (9.16 mm) | 39” X 61.5’ | 200 | 18 | Sq. Ft. |
| R-Vent® | .250” (6.35 mm) | 39” X 61.5’ | 200 | 18 |
Sq. Ft. |


