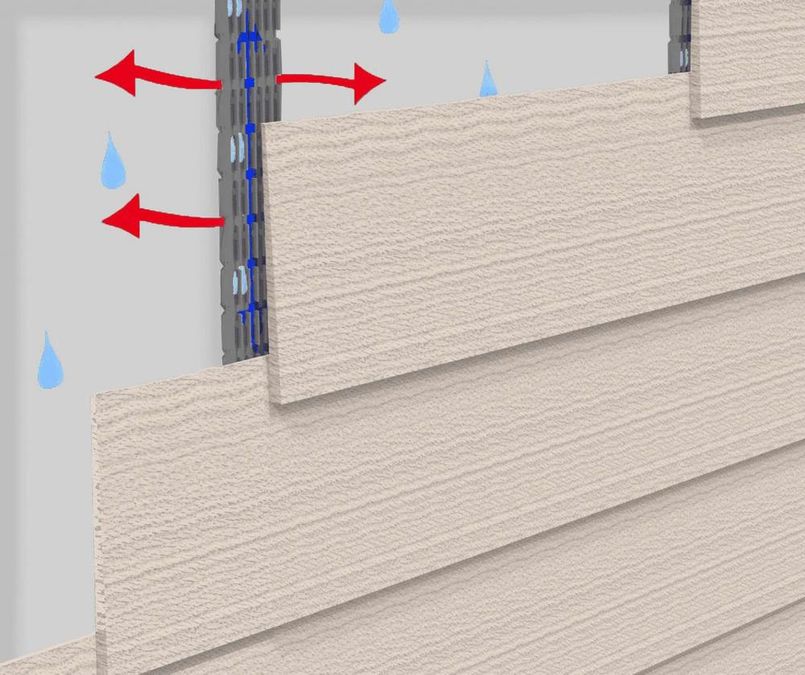
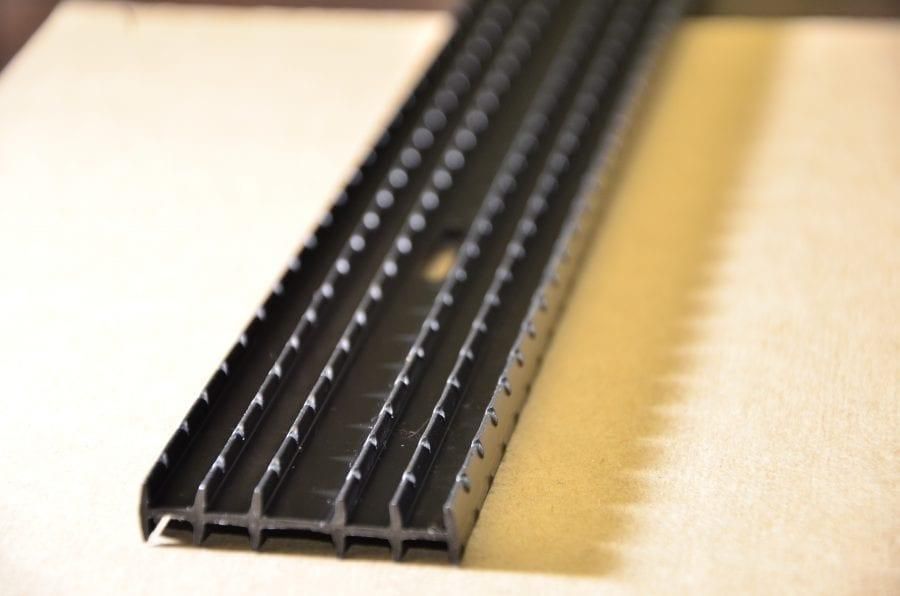
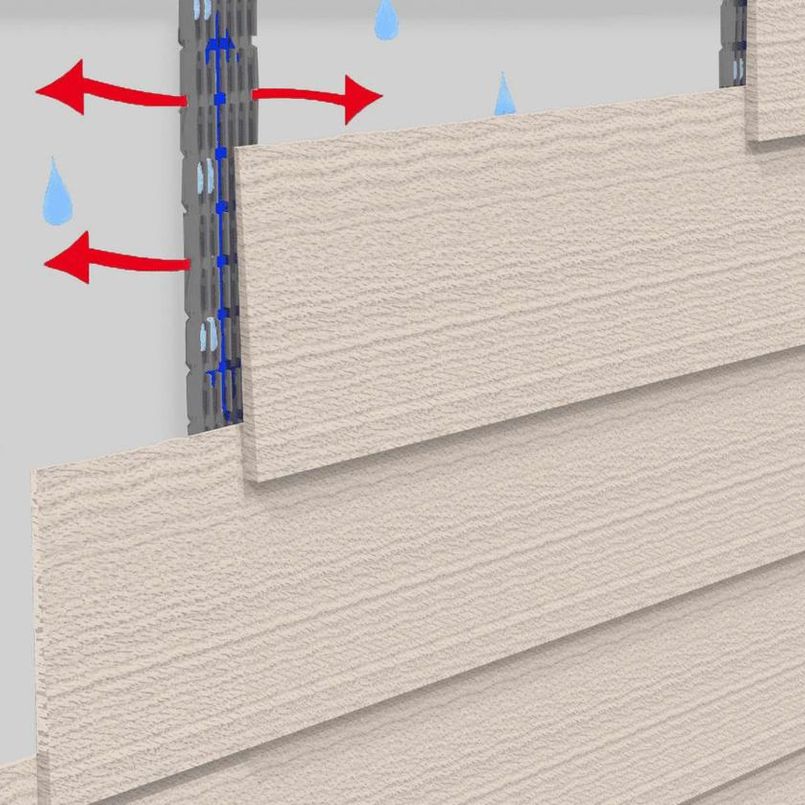
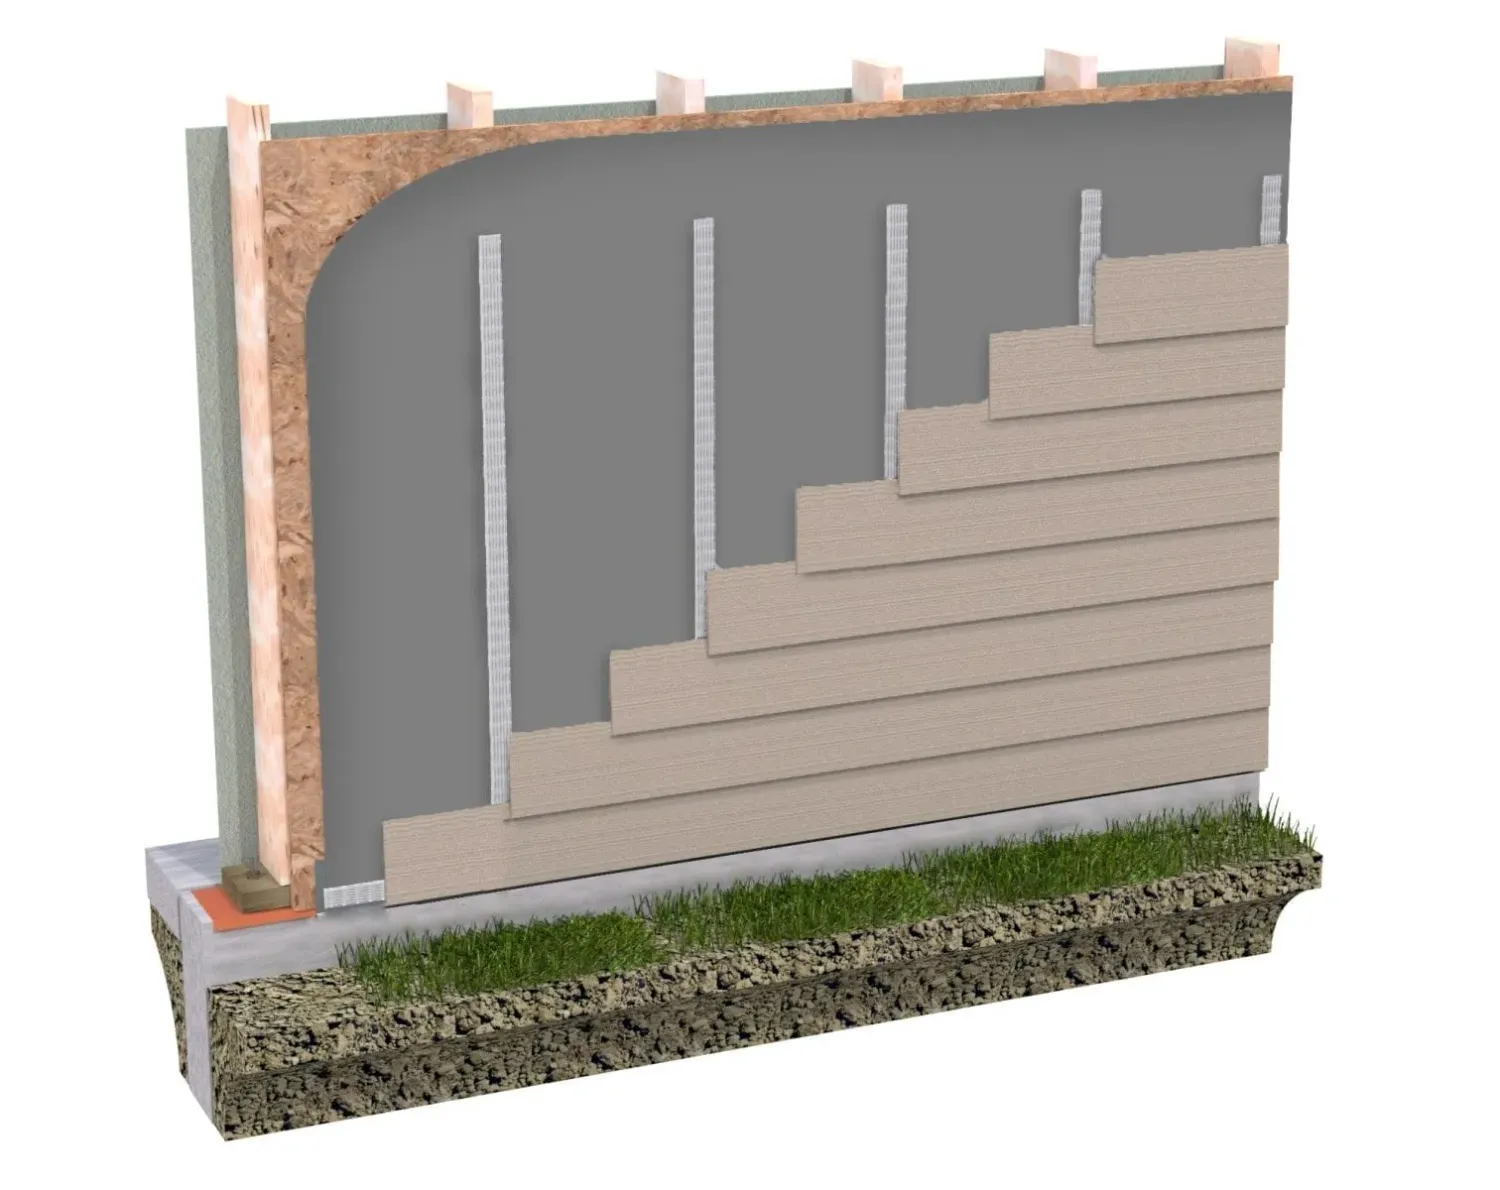
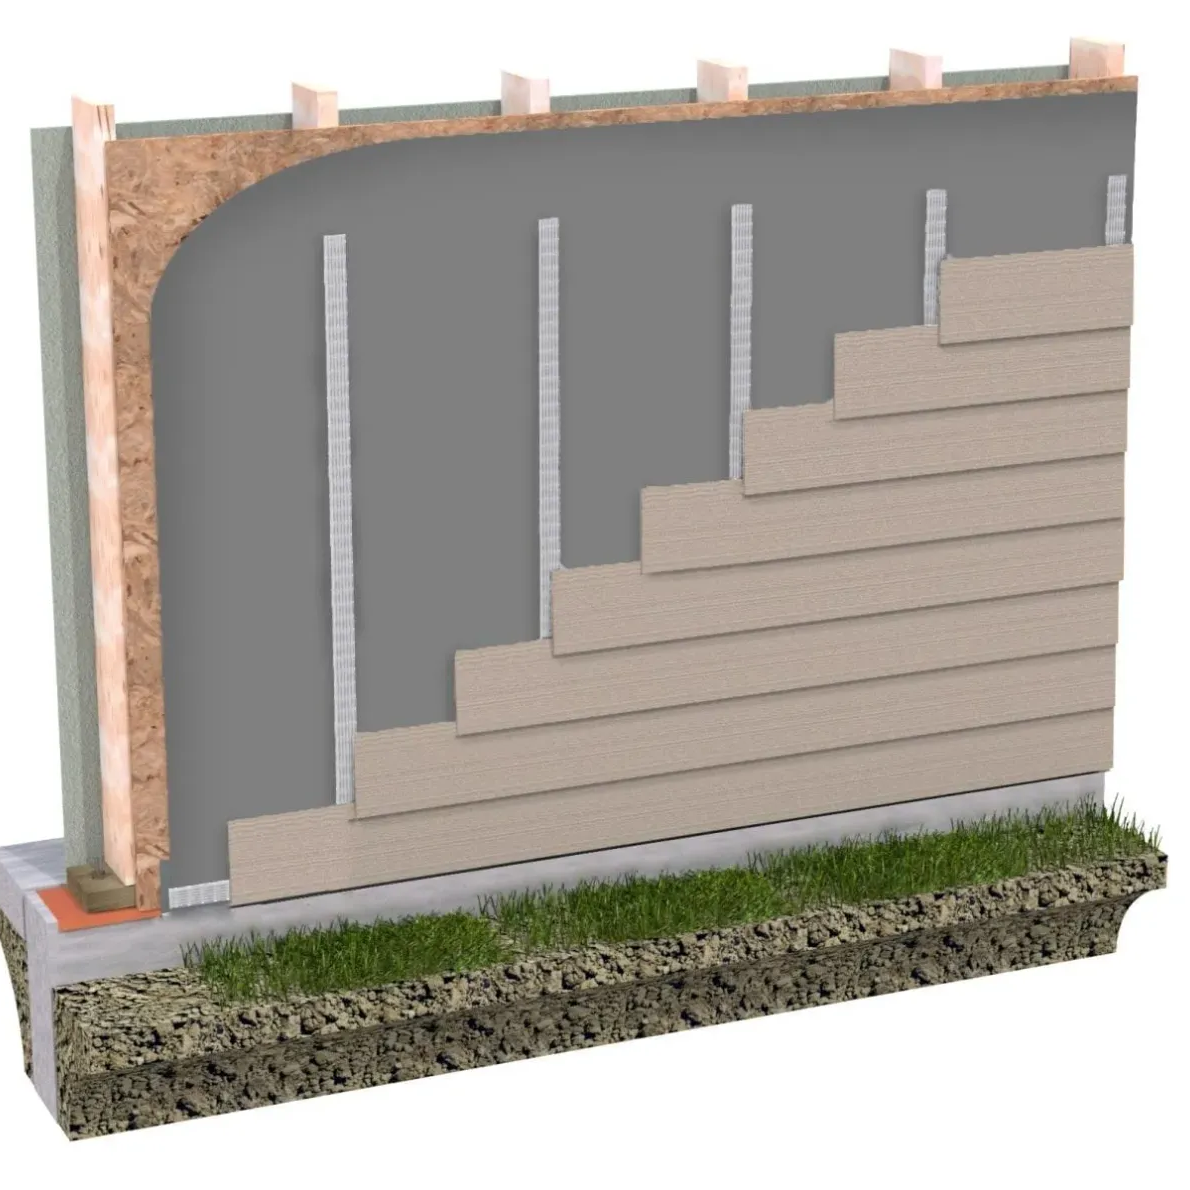
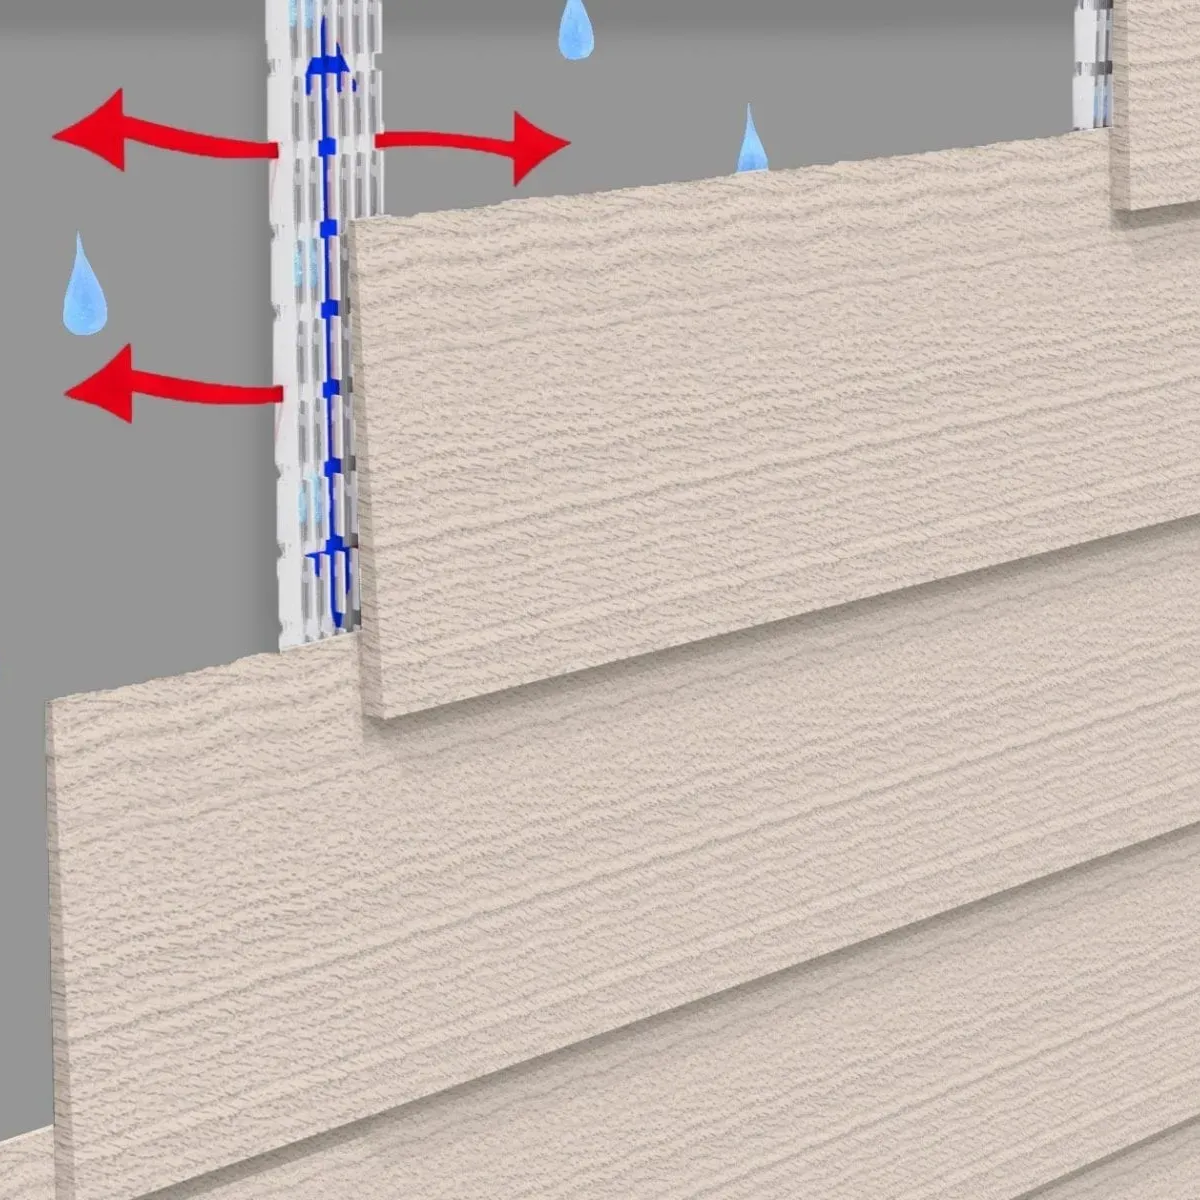
Advanced Building Products has taken the traditional furring strip and re-designed it to function in today's building environment.
Additional Information, Details, and Resources
Installation Instructions
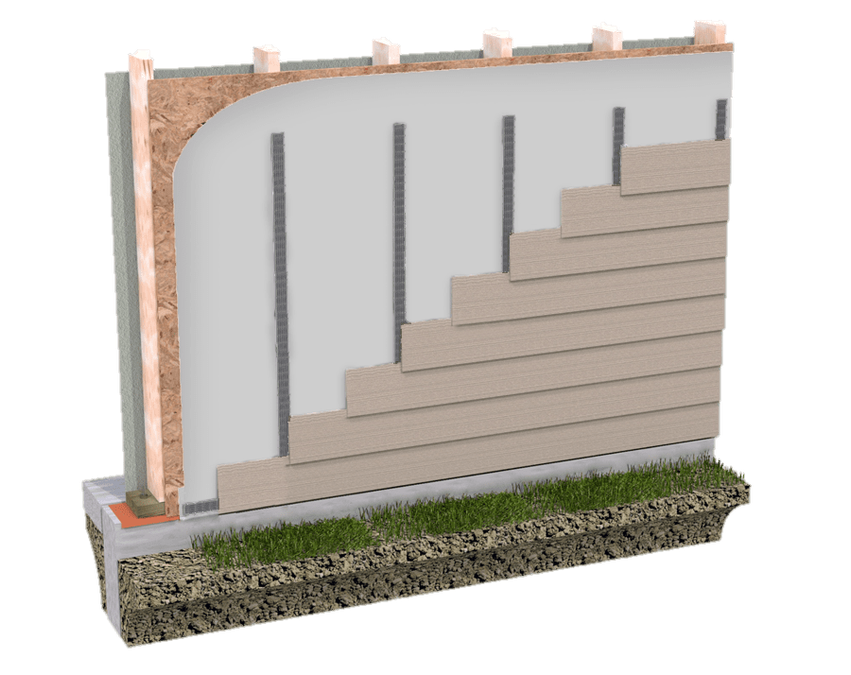
Installation over 1/2″ OSB or plywood intended for clapboard siding
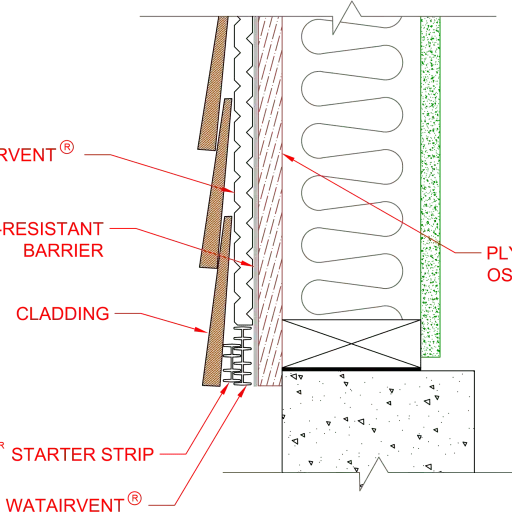
- Install your weather resistant barrier (WRB) of choice over the surface area of the sheathing. Be sure to tape all seams.
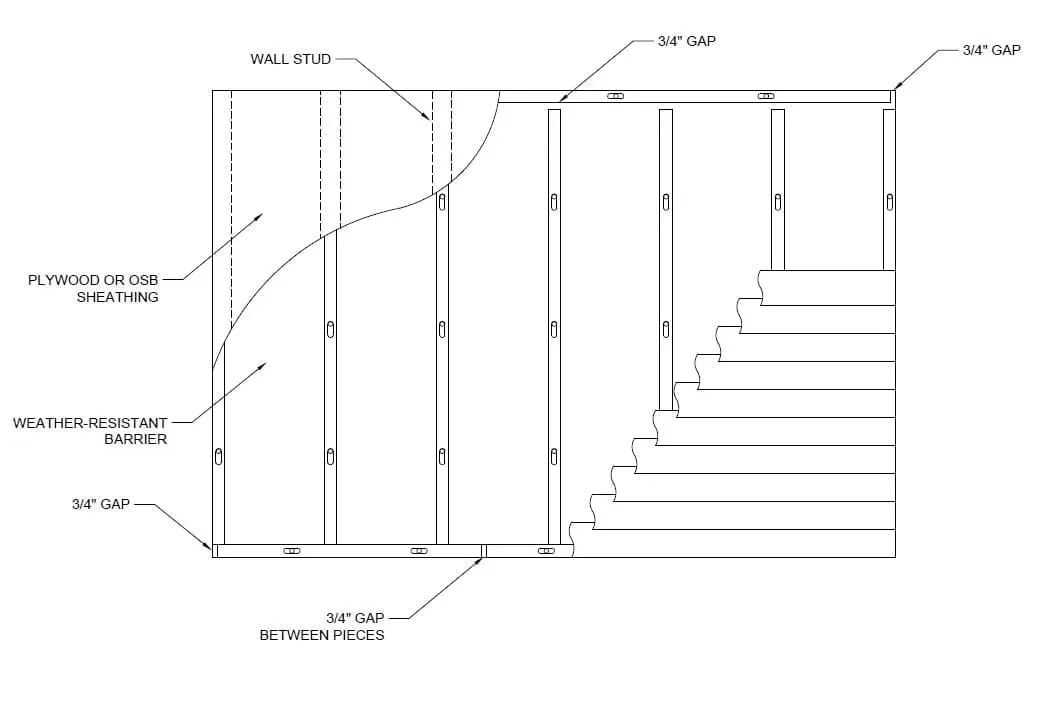
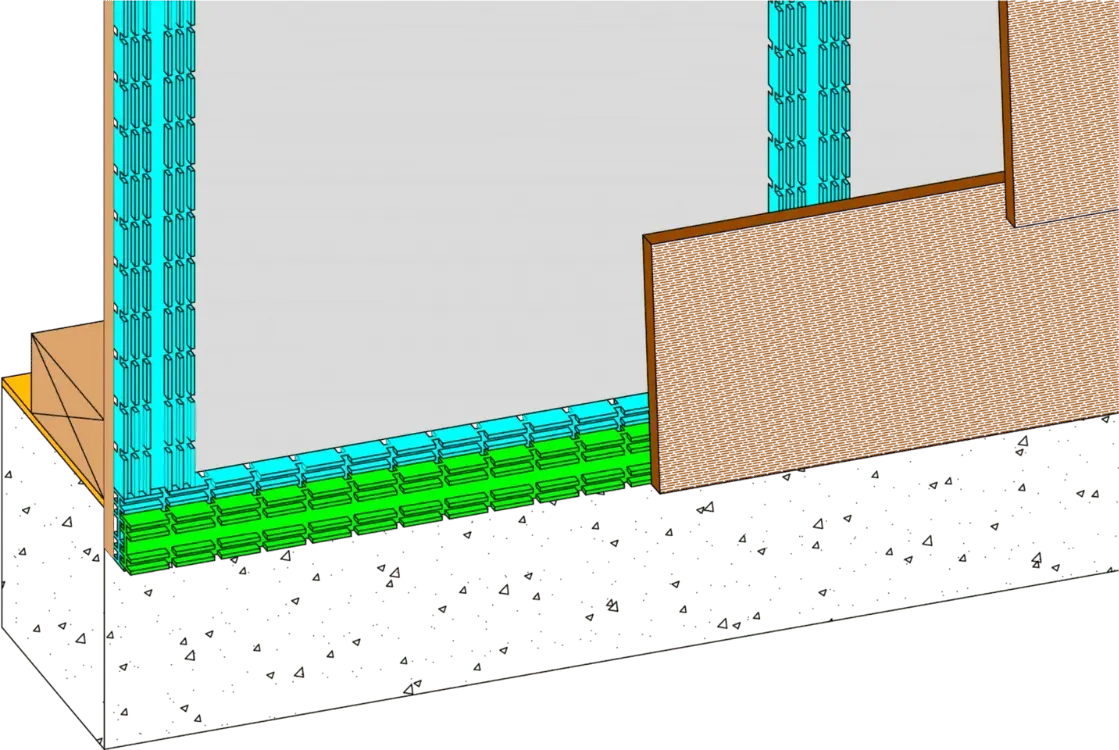
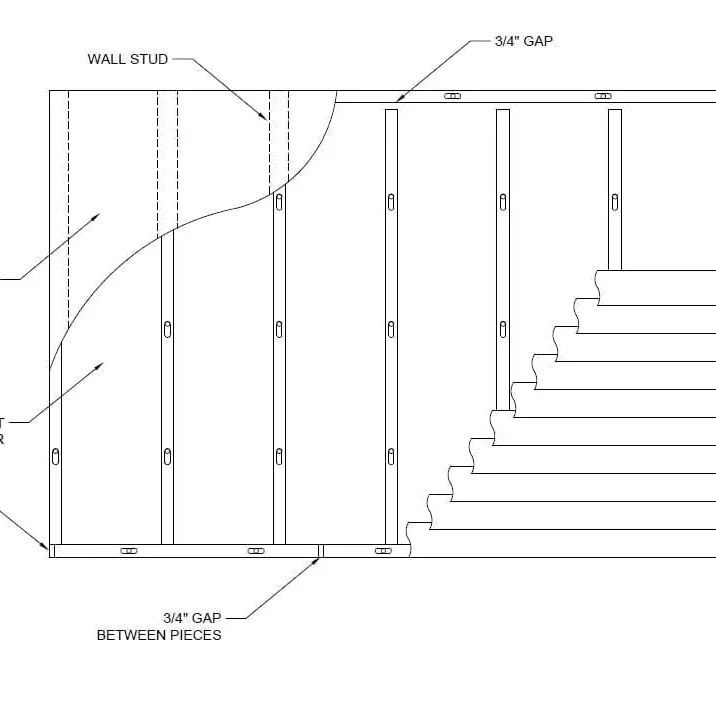
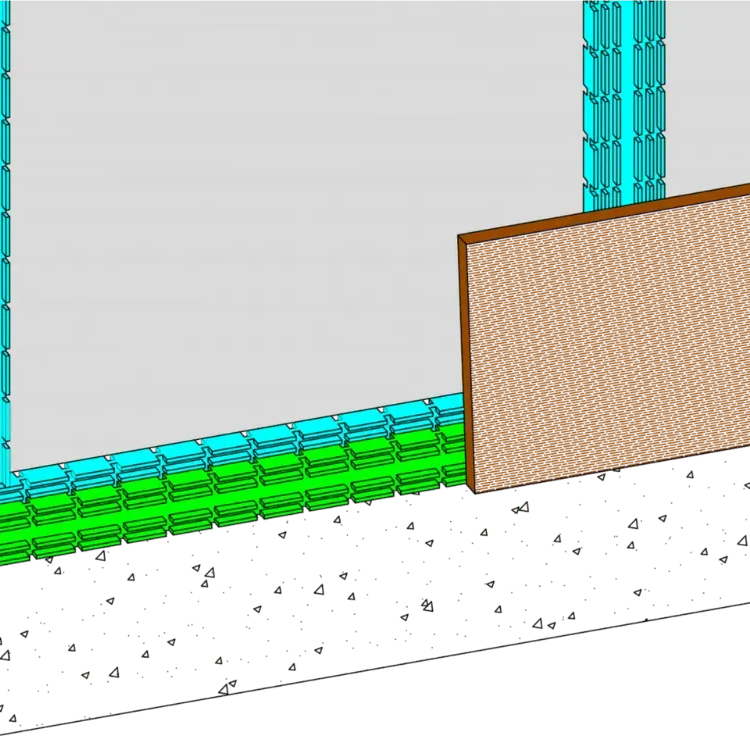
- Place Watairvent® Furring Strip horizontally at the base of the wall around the entire perimeter (Diagram A) to prevent bugs from entering the channel.
- Place the Watairvent® Furring Strips vertically every sixteen inches on center aligned with the wood studs (Diagram A). Fasten the Furring Strip with either a 1.75″ nail or other approved fastener. It is important to penetrate the studs by at least a 1 1/4″. Per R703.15.2 of 2018 Intl. Residential Code. Can be installed horizontally as well.
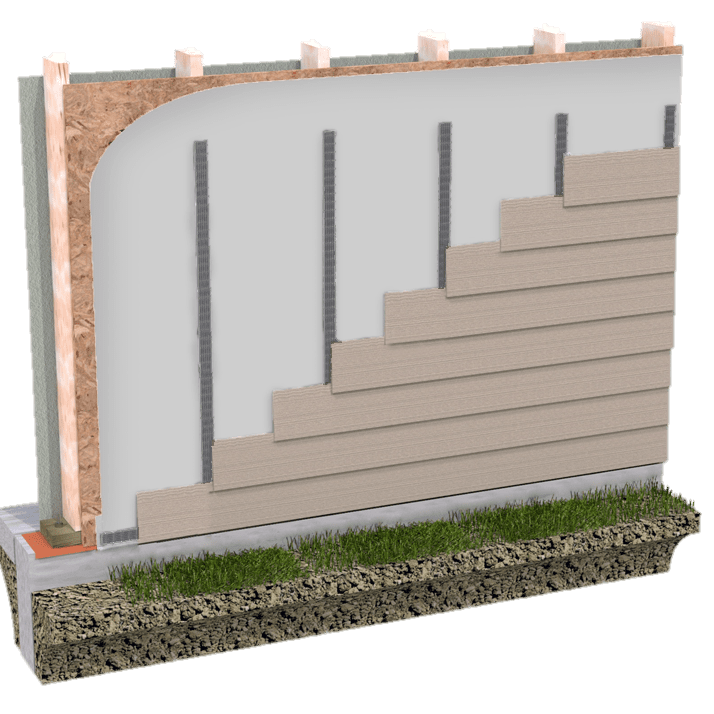
Installation over 1″ insulation intended for clapboard siding
- Place the WRB of choice between the sheathing and rigid foam insulation. A drainable WRB is preferred.
- Place Watairvent® Furring Strips horizontally at the base of the wall around the entire perimeter to prevent bugs from entering the channel (Diagram A).
- Place the Watairvent® Furring Strips vertically every sixteen inches on center aligned with the wood studs. Be sure your fastener length accounts for the entire depth of the assembly. Follow siding manufacturers installation instructions. Can be installed horizontally as well.
Installation at Windows and Trim
- Flash window per manufacturers recommendations.
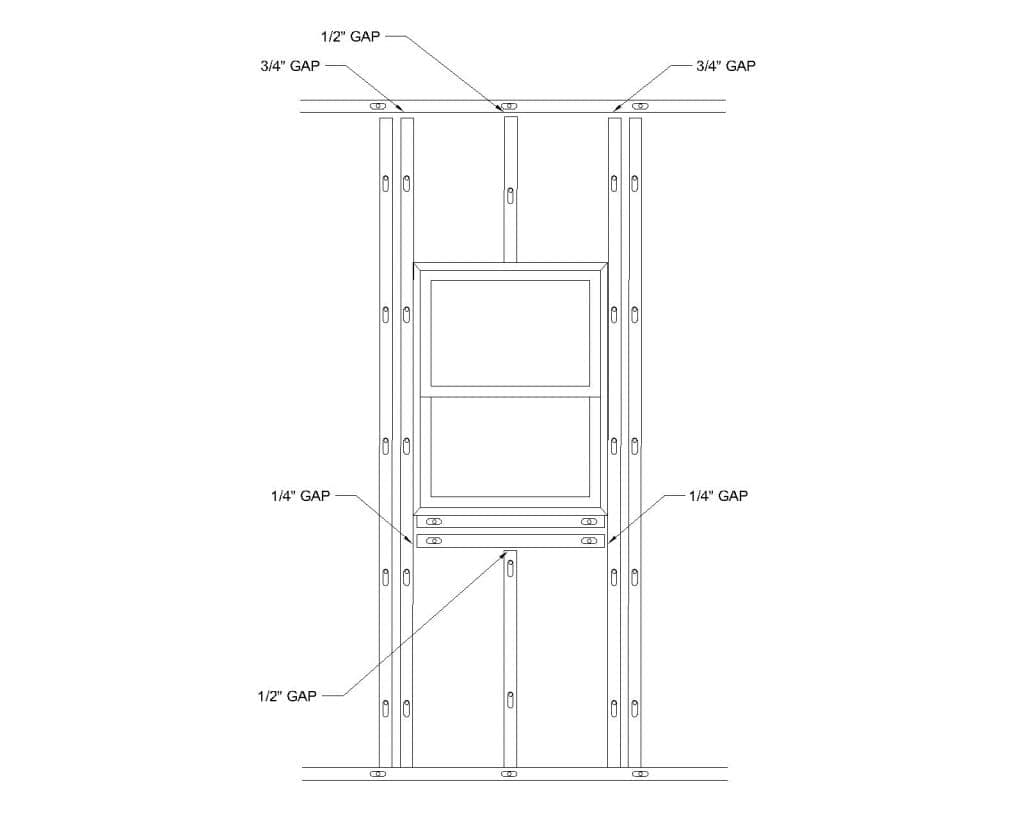
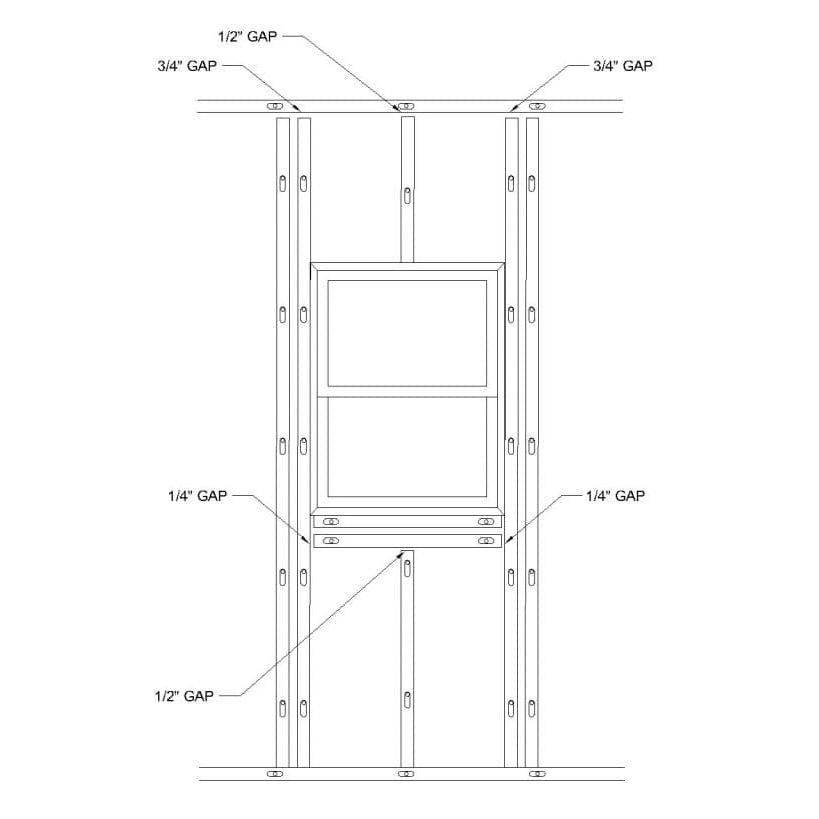
- Additional Watairvent® Furring Strips should be installed behind vertical window trim and corner trim.
- Watairvent® Furring Strips should be installed directly up against the windows nailing flange (Diagram B).
- Leave necessary gaps for differential movement. (Diagram B).
- Trim windows and doors per manufacturers recommendations.
Installation at top of the wall
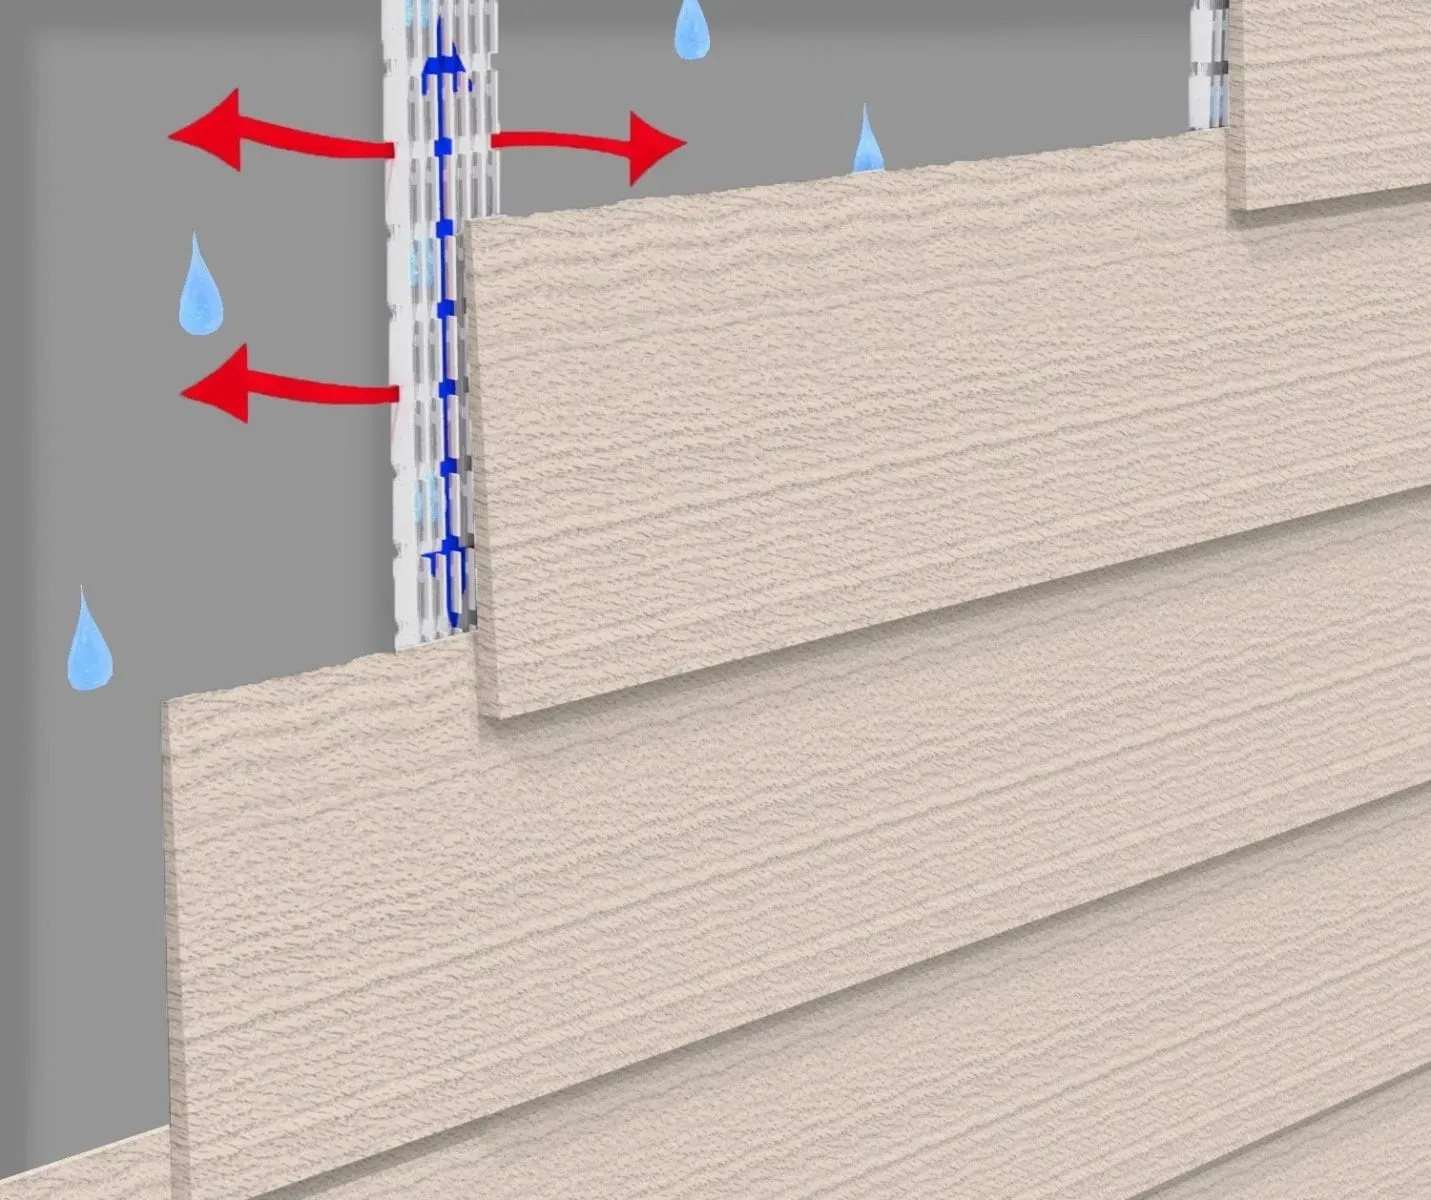
- Watairvent® Furring Strip can be installed horizontally at the top of the wall. Similar to the base of the wall whereas the furring strip will act as the bug screen and the airflow channels will remain free of debris.
- Leave a .75″ gap between vertical and horizontal furring strips to allow for differential movement (Diagram A).
Siding Installation
- Install all wood clapboards and cedar shakes per siding manufacturers recommendations.
Cutting Instructions
- Use a plywood blade installed backwards (often used for cutting vinyl siding) or cutting shears for best results.
Download Our Engineered Rainscreen Product Installation Guide
Products Details & Renderings
-
-
-
-
-
-
 Watairvent Starter Strip Detail
 -
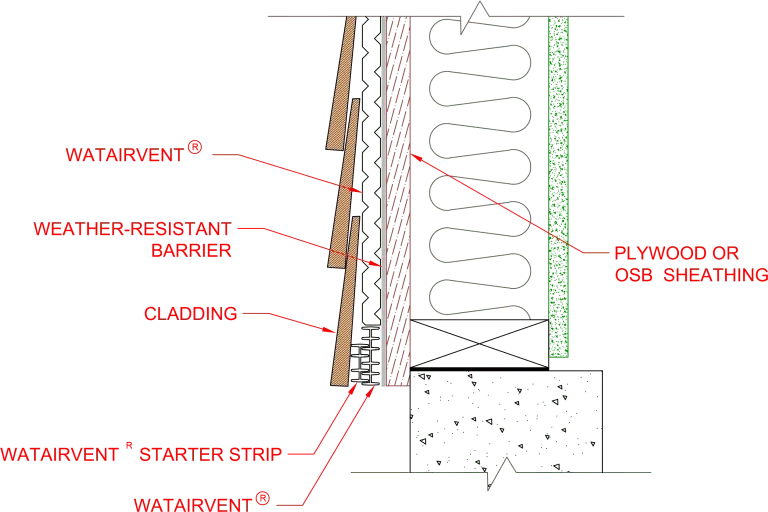 Watairvent Starter Strip Isometric Detail
3-Part Specifications
Packaging Information
| Batten / Furring Strips | Material | Thickness | Piece Size | Pieces Per Box | Boxes Per Pallet |
|---|---|---|---|---|---|
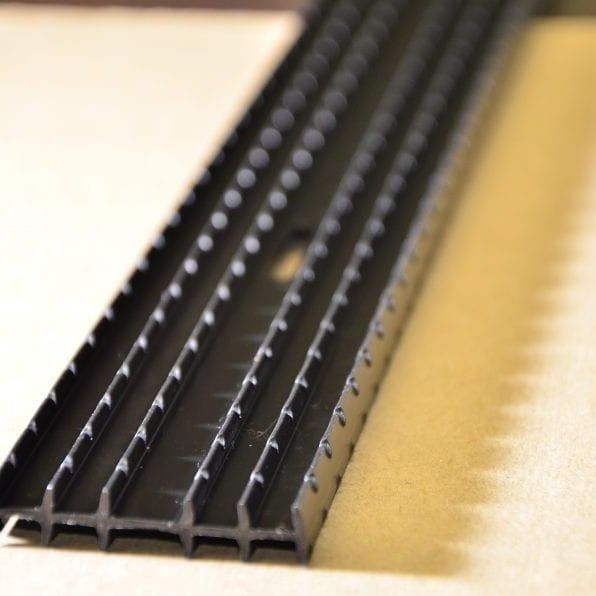
| Watairvent® Furring Strips – Black (For Open Joint Cladding) | Polypropylene Plastic | .375” | 1.75” X 8’ | 50 (400 lineal feet) | 36 |
Advanced Building Products 25 Year Limited Warranty
Advanced Building Products Incorporated (“Advanced Building Products”) covers certain products under a Limited 25 Year Warranty. For details or to file a warranty claim, please contact:
Advanced Building Products, Inc.
95 Cyro Drive, Sanford, ME 04073
Tel. 800-252-2306 | Fax. 207-490-2998 | Email: info@abp-1.com
AIS / SDS / MSDS / LEED Sheets